Inspections
Inspections are structured checklists technicians fill out on a work order - a pre-service walkaround, a post-service checklist, a brake inspection. Each item is a single question (pass/fail, or pass/fail/note) and the whole sheet attaches to the work order with timestamps and the tech's name.
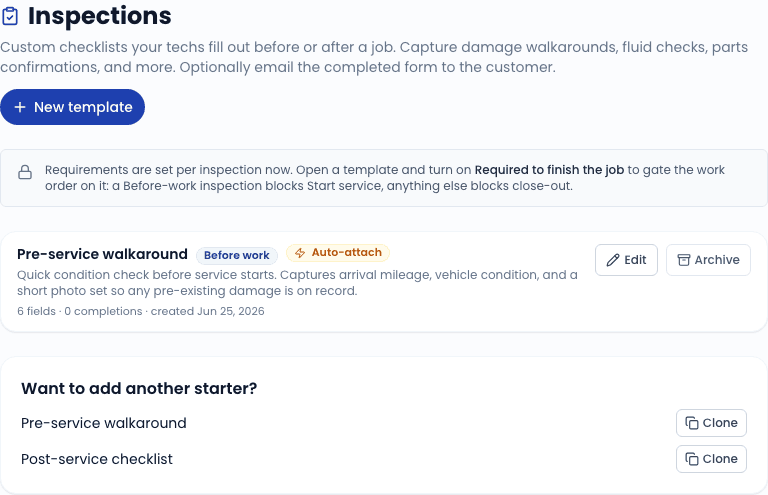
Configure templates in Settings -> Inspections. Techs see and complete them from the work order on mobile or desktop.
Why use inspections
- Documentation for the customer - a completed inspection becomes a clean PDF attached to the invoice. Customers see exactly what was checked.
- Liability protection - the pre-service walkaround captures pre-existing damage. If a customer claims you scratched their bumper, the walkaround photo proves the scratch was there at arrival.
- Upsell triggers - "Air filter looks bad" on a routine oil change turns into a quote line item before you leave the driveway.
Starter templates
Two templates ship with every new account:
- Pre-service walkaround - exterior condition, mileage, dash warning lights, fluid levels, photo capture.
- Post-service checklist - work-completed sign-off, oil-level check, leak check, photo of the dipstick.
Both are starters - clone them in Settings -> Inspections and edit your copy to match how your shop runs.
When inspections fire
Each template has a Trigger:
| Trigger | When it fires |
|---|---|
| Before work | Required completion before the tech can mark the WO as in-progress. |
| After work | Required completion before the tech can mark the WO as completed. |
| Before + after | Both above. |
| On demand | Not required. Tech can attach it manually from the WO. |
The Require inspections toggle at the top of the inspections settings page is the master switch (backed by the requireInspectionsBeforeComplete flag on your organization). When off, no inspection is required to advance a WO regardless of individual template triggers - the templates are still available on demand. When on, techs cannot mark a WO complete until every required inspection on it is filled out and submitted.
Building a template
Open Inspections settings
Settings -> Inspections. (Reached from the Settings sidebar.)
Clone a starter, or click "New template"
Cloning a starter is the fastest path; you get a working set of items you can edit. Starting from scratch gives you a blank template.
Set the trigger
Pick when this inspection should be required (or on-demand).
Build the items
Each item has:
- Question - the thing the tech is checking.
- Type - pass/fail (binary), pass/fail/note (binary plus a free-text note), or photo (require a photo upload).
- Section - optional grouping; sections render as headers in the tech view.
- Required - if true, the tech cannot submit the inspection without answering this item.
Drag-and-drop reorders items within a section.
Save
The template is live immediately. New work orders that match the trigger will require it.
Editing a template does not retroactively change inspections that were already completed against it. The completed inspection on a historical WO is a snapshot - your edits to the template only affect future runs.
Photos
Photo items use the same upload pipeline as customer-facing assets (Vercel Blob storage, when configured). Photos compress to a reasonable size before upload, so the tech does not have to think about it. Each photo is timestamped and stamped with the tech's user ID.
Photos appear inline on the completed inspection PDF and are clickable for a full-size view from the WO detail page.
Archiving templates
You cannot delete a template once it has been used on a WO - that would invalidate historical references. Instead, click Archive in the template list. Archived templates are hidden from the create-new menu but stay available for historical lookups. To revive, click Restore in the archived templates section.
Related
- Completing a work order - where inspections plug into the WO flow
- Settings overview - templates list and the require toggle live under Settings -> Inspections